BGINFO - A Posh Recreation
Recently I have been building a lot of Windows Servers in different environments - one
Most malware is designed to reach back out to the internet, either to wait for further instructions or to send data back to the bad guys. Sometimes we want to allow this to happen, mostly when dealing with Web Exploits that typically use a multistage method to infect your machine.
For those times when we don’t want malware to interact with the internet, but we want to see how it behaves. Or if we are testing our own lab generated samples, we need to deploy a Fake Internet.
There are many ways we could do this, set up servers running the required services, deploy honeypots or even create our own set of scripts if we are that savvy.
Fortunately someone has already done most of the hard-work for us.
My deployment of preference is InetSim.
InetSim is not very actively maintained but its stable and feature full so this isn’t a major issue for me.
This installation guide was based on using a turnkey linux distribution, but any debian based os should follow a similar process.
InetSim has some pre compiled Debian Packages that we can use for a simple installation.
Edit the Sources list to include InetSim, the sources.list is not in the usual place on turnkey
root@core ~# nano /etc/apt/sources.list.d/sources.list
add this line
deb http://www.inetsim.org/debian/ binary/
save the file and install the signature key
wget -O - http://www.inetsim.org/inetsim-archive-signing-key.asc | apt-key add -
Update APT
root@core ~# apt-get update
And now we can install.
root@core ~# apt-get install inetsim
Reading package lists... Done
Building dependency tree
Reading state information... Done
The following extra packages will be installed:
libdigest-hmac-perl libdigest-sha1-perl libio-multiplex-perl libipc-shareable-perl libnet-cidr-perl

Total 1143 (delta 75), reused 1085 (delta 52)
A minute or two later and we are installed. now its just a matter of configuration and we will have our own fake internet in a box.
Configuration
Before we dive in to the configuration here are some key file locations.
If we want our simulator to start as soon as the OS boots we need to edit the init.d config file.
open it up in your favorite editor and change the line that reads:
ENABLED= 0 to ENABLED=1
Now let’s get on to the Main Config File. This file is fairly comprehensive and fairly well commented throughout. For the sake of brevity im only going to cover the main features, enough to get it up and running. The more complex features ill discuss in future posts as i use them in the Lab.
First lets look at our available services:
  * start_service dns
  * start_service http
  * start_service https
  * start_service smtp
  * start_service smtps
  * start_service pop3
  * start_service pop3s
  * start_service ftp
  * start_service ftps
  * start_service tftp
  * start_service irc
  * start_service ntp
  * start_service finger
  * start_service ident
  * start_service syslog
  * start\_service time\_tcp
  * start\_service time\_udp
  * start\_service daytime\_tcp
  * start\_service daytime\_udp
  * start\_service echo\_tcp
  * start\_service echo\_udp
  * start\_service discard\_tcp
  * start\_service discard\_udp
  * start\_service quotd\_tcp
  * start\_service quotd\_udp
  * start\_service chargen\_tcp
  * start\_service chargen\_udp
  * start\_service dummy\_tcp
  * start\_service dummy\_udp
The default setting of InetSim has all services enabled, if you want to disable any simply comment out the line by prefixing it with a #
By default InetSim binds to the loopback address. this is no good when we want our lab to send traffic that way. Locate the line
#service_bind_address 10.10.10.1
Un comment the line and change it to match your IP Address.
Next lets set up how DNS is resolved, again by default InetSim sets to your loopback address. lets change this to redirect to our self.
If your playing with specific malware on another machine you can use this option to redirect all traffic to that machine instead. A better alternative is to use the Static DNS section we will look at a little later.
#dns_default_ip 10.10.10.1
Un comment the line and change it to match your IP Address
The next change is optional. The hostname that is sent back, i have yet to see any malware that tries to fingerprint InetSim but changing this setting will help prevent this if it ever happens.
#dns_default_domainname some.domain
Uncomment and change some.domain to some.domain! e.g. mymalware.lab
DNS Static. As mentioned earlier this section acts like a remote HOSTS file and allows us to set specific traffic.
it’s as simple as adding a line like this:
dns_static www.foo.com 10.10.10.10
The last section we are going to look at in this section is the HTTP FakeFile setup. This allows InetSim to return any requested files, like EXE, DLL, JPG amongst others.
InetSim comes with some default files but we can change or add to this list.
HTTP fake file has two sections, the config file defines what files are returned, and there is a folder that contains the files we want returned.
Adding a file is as simple as adding a new line and copying a file in to the DIR and restarting the simulator.
root@core ~# /etc/init.d/inetsim restart
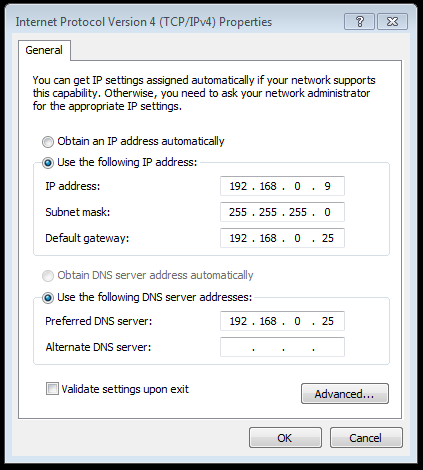
With our fake internet running we need to tell our test machines where to find it.
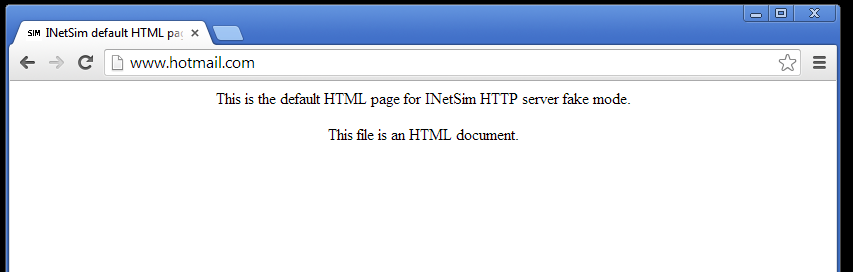
Once that’s set up we can test by browsing to a site to test our DNS resolution. . .
and trying to download an exe file to test HTTP Fake Files . . .
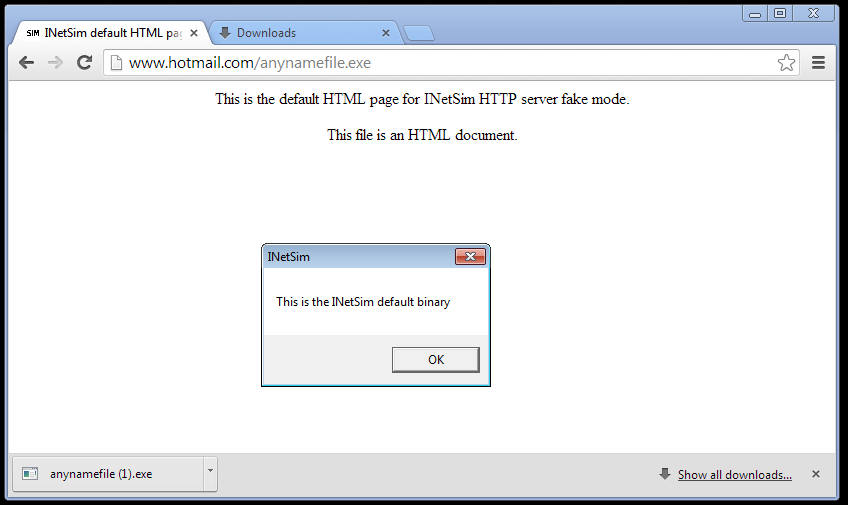
Success :)
I use InetSim in my lab to simulate the internet and to provide controlled responses to the malware.
This is fine if the malware is using DNS because we are running the DNS service and making sure all out traffic goes that way.
This doesn’t help if the malware is using hard coded IP’s. There are a couple of ways we could deal with this.
We can use ARP spoofing and HoneyD to do the intercept and service emulation, we could map our network to match the expected IP’s and many more methods im sure but i prefer to stick with InetSim.
My solution was to use Route / IP Tables to redirect the traffic to my InetSim machine.
This is achieved in two steps.
On the Windows Machine we create a new route that directs all traffic to our inetsim ip address.route ADD 0.0.0.0 MASK 255.255.255.255 <inetsim ip>
on my host it looks like this:
route ADD 0.0.0.0 MASK 255.255.255.255 192.168.0.130
On our InetSim Machine we need to tell it not to drop traffic that was not destined for our IP address. We can do this with a simple ip tables rule.
iptables -t nat -A PREROUTING -i eth0 -j REDIRECT
With both of these commands in place any malware communication will be successfully redirected to our Sim.
Once your done if you want to remove these entries just enter the following command on windows.
route DELETE 0.0.0.0
and this one on the inetsim host
iptables -t nat -D PREROUTING -i eth0 -j REDIRECT
Reports are basic text files that contain any information on connection attempts. It does not perform full Packet Capture, ideally you would run an Open FPC instance that is intercepting all the traffic as it passes between the clients. See the Posts on IDS and OpenFPC for details on this deployment.
All the reports are written in to /var/log/inetsim
any post data is written to /var/lib/inetsim/
There is a lot more that InetSim is capable of doing with other services and greater configuration read the Comments in the Config File or drop me a message here. I’ll see what I can do to help.