BGINFO - A Posh Recreation
Recently I have been building a lot of Windows Servers in different environments - one

In my previous post I had decided / was forced to replace ESXi with ProxMox and that it was capable of running OpenVZ containers, which was something I wanted to play more with.
OpenVZ Containers are a method of OS virtualization that can create multiple, secure, isolated Linux containers. Each container runs independently of each other and of the main Operating System. You can read more about OpenVZ containers on Wikipedia
Creating Containers in ProxMox is relatively simple and ProxMox provide a selection of templates that can be downloaded direct to the device.

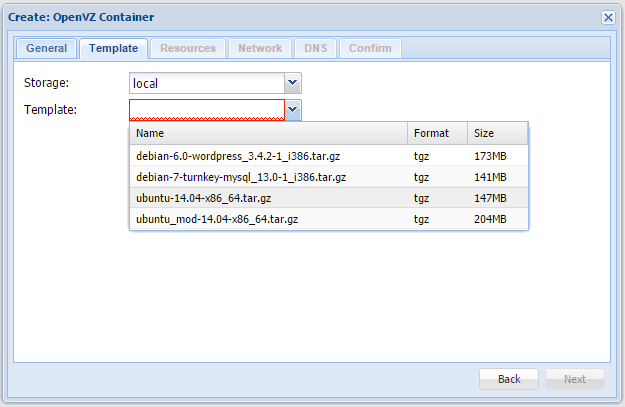
As you can see from the list there are plenty of turnkey applications available but the choice of operating systems is limited. We can supplement this with official releases straight from the OpenVZ templates portal at http://openvz.org/Download/template/precreated.
I downloaded the ubuntu-14.04-x86_64.tar.gz{.extiw} and uploaded it to my server using the upload form the same way we pushed ISO files in the previous post, selecting template instead of ISO in the type field.
Any templates we upload are immediately available to use. When you first build one of these templates it is not possible to connect via console and they have no active network interfaces. So managing the container is a little difficult.
The aim of this post is to show you how to update the OS to allow console connections and to set a DHCP address. Once we have done this we will create a new template so future deployments are easier to manage.
First step is to create a basic container.
The values we set here are defined by the user each time we build a template so we don't need to worry a lot about the values.
At the template dropdown select the template we just downloaded.
Resources can be left on the default values as i mentioned these are set for each build and are not specific to any future templates.
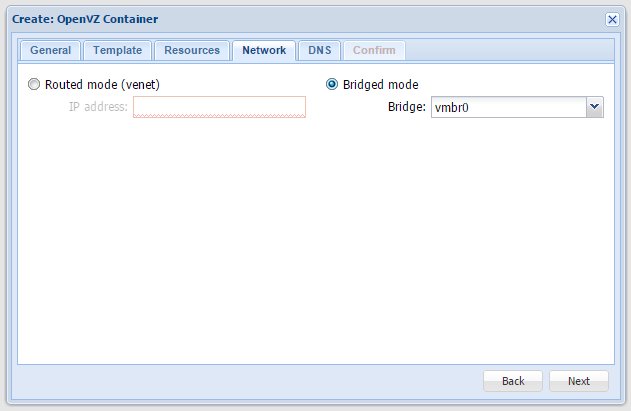
Select your choice in networking as I wanted easy access to the internet i just bridged.
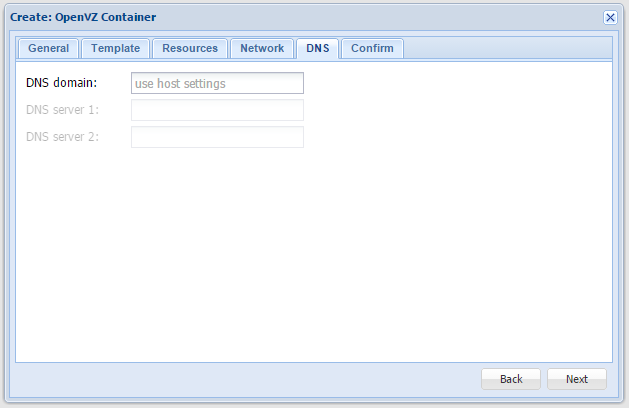
The remaining settings can remain at their default values. Click finish and wait for the task Viewer to read TASK OK. This is our container built. Start the container by selecting it from the left hand tree and then clicking start. Take a note of the container ID (3 digit number) we will need this for the next step.
Attempting to connect to the console will typically result in a blank screen with a cursor that does not respond to input.
To setup console access we first need to connect to the proxmox host. We can do this via ssh or by using the web shell provided in the web interface.
Connect to the container with
# vzctl enter 105
where 105 is the container number you created earlier.
from here we need to edit /etc/init/tty1.conf.
# vi /etc/init/tty1.conf
modify the file to match
# tty1 - getty
#
# This service maintains a getty on tty1 from the point the system is
# started until it is shut down again.

start on stopped rc RUNLEVEL=[2345]
stop on runlevel [!2345]

respawn
exec /sbin/getty -8 38400 tty1
reboot the container by issuing the reboot command. Make sure you are still connected to the template and your not going to reboot your server. Or just stop and start the container from the web interface.
You should now be able to access a prompt by connecting to the console. You may have to hit return on first connect.
At this point you can make any more adjustments to this container that will form your template. I run an apt-get update and upgrade and i like to have at least one interface come up on DHCP so if im deploying remotely i can access the ssh port. I also prefer nano instead of vi which isnt included by default.
Once you have made all the changes and installed all the software packages we are ready to move on to the next stage.
There are some items we don't want to be included in our template, and there are some things we need to be specifically unique in our templates like ssh host keys.
If you used apt-get update|upgrade|install then clear your cache if nothing more than to save some space
# apt-get clean
The default template has series of start up scripts that regenerates SSH host keys and dhcp6cctlkeys then delete the init scripts. All we need to do is copy these files back in to our template. I extracted the files out of the existing template and have also included them all on my dropbox for simple wgets. These are valid for ubuntu-14.04-x86_64 but should be compatible with most linux distros.
Download and link the files with the following commands, or manually copy them from the template archive in to location and then set the symbolic links.
# cd /etc/init.d/
# wget -O dhcpv6_hack.sh https://www.dropbox.com/s/vx9sjmmdhgl21pb/dhcpv6_hack.sh?dl=0
# wget -O ssh_key_hack.sh https://www.dropbox.com/s/kv4opckp5emvdmk/ssh_key_hack.sh?dl=0
# chmod +x /etc/init.d/dhcpv6_hack.sh
# chmod +x /etc/init.d/ssh_key_hack.sh
# ln -s /etc/init.d/dhcpv6_hack.sh /etc/rc2.d/S11dhcpv6hack
# ln -s /etc/init.d/ssh_key_hack.sh /etc/rc2.d/S11sshhack
Once your finished power off the container using the poweroff command. Ensure that if you are using the host server console you don't accidentally power off your host.
Once the container is down we need to jump back on the host either via ssh or using the web shell.
Templates are just tar.gz archives of the file structure so all we need to do is compress the file structure of the template we edited, excluding any files we don't want to be included. The easiest way to exclude more than a couple of files is to create an exclude file.
# cd /var/lib/vz/private/105
# nano /tmp/exclude.txt
enter the relative path to any files or dirs on separate lines.
Now create the template file with
# tar -X /tmp/exclude.txt -czvf /var/lib/vz/template/cache/template_name.tar.gz .
Watch for the trailing space and period ( .) this is important
Once the command completes you should now have a new template available in the template selection. Its that simple and you can be as creative as you like.
To remove templates just delete the tar.gz file from the /var/lib/vz/template/cache folder.
# rm -f /var/lib/vz/template/cache/template_name.tar.gz
And thats that, you should now have a custom template you can deploy in a very short amount of time.